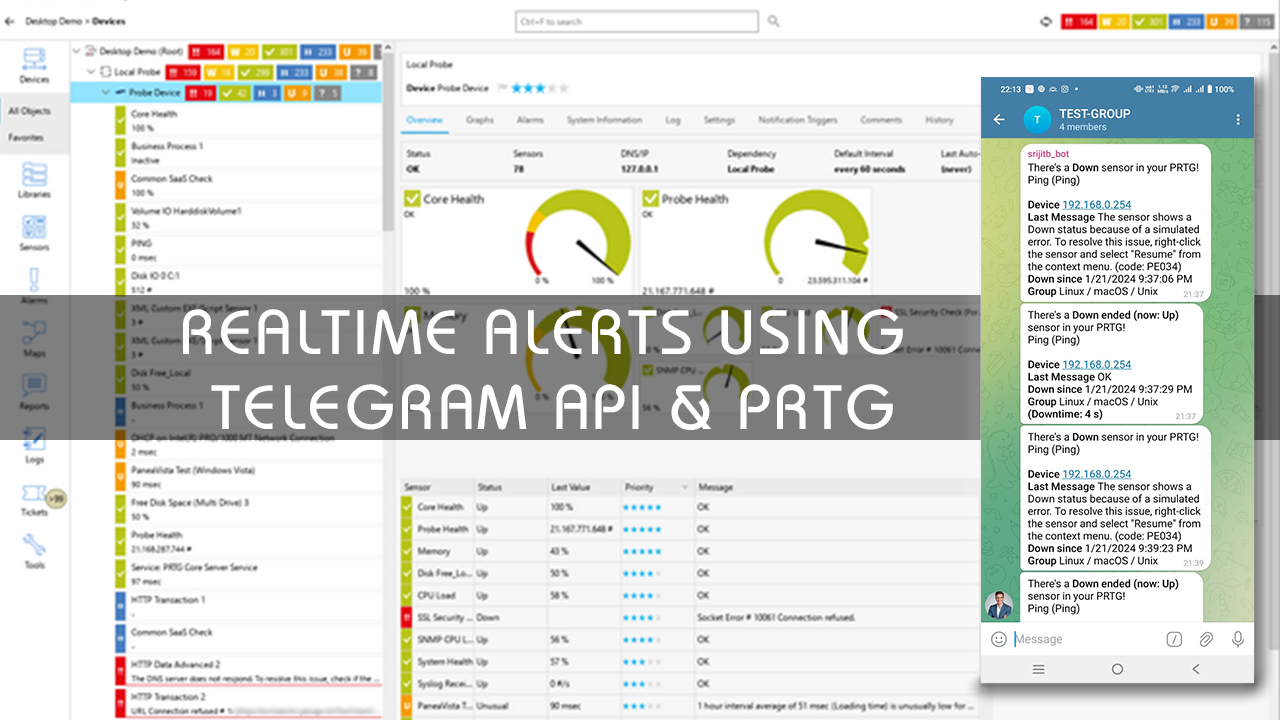
Network Operations Engineers must be aware of the current network status and outages in real time. So, in this tutorial I will demonstrate how to create a telegram bot and connect with Telegram with PRTG Server for instant messaging alerts to the engineers or customer regarding outages and device health to provide a seamless user experience and a higher network uptime.
Telegram Bots: Streamlining Communication and Automation
Telegram bots have revolutionized the way users interact on the messaging platform. These automated assistants enhance communication by providing a wide range of functions, from simple tasks like setting reminders to complex actions like language translation. With a user-friendly interface, creating and deploying bots on Telegram is accessible to developers and businesses alike.
Bots bring efficiency by automating repetitive tasks, saving time and effort. They can be employed for entertainment, information retrieval, or even e-commerce transactions. Additionally, Telegram’s robust security features ensure that bot interactions are secure and private.
The platform’s Bot API facilitates the creation of bots with diverse capabilities, contributing to a dynamic and engaging user experience. As Telegram continues to evolve, the versatility of its bots remains a key factor in the platform’s popularity, offering users personalized and efficient solutions for their messaging needs.
In this tutorial, you will learn how to connect telegram with PRTG easily with Telegram Bots & API.
Video Tutorial
-
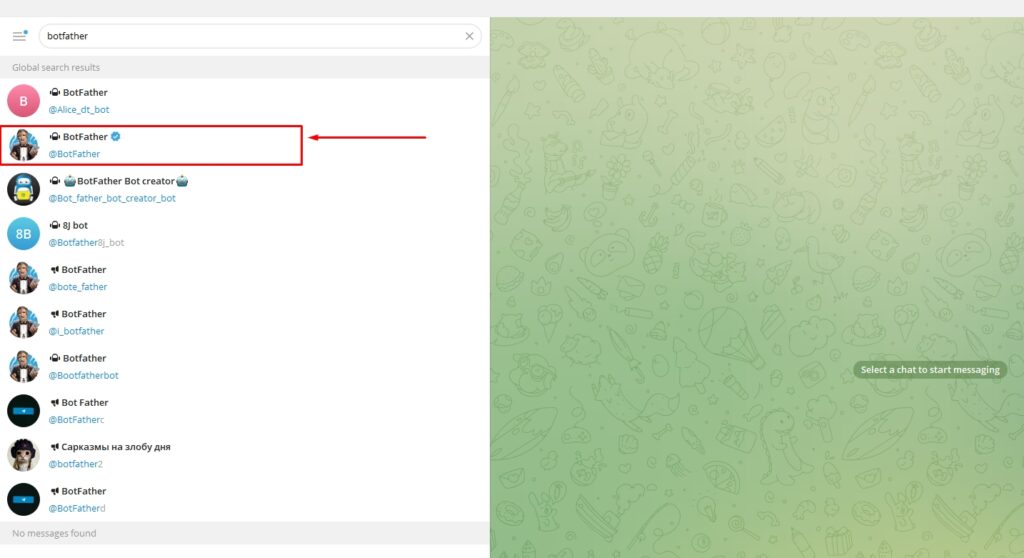
Create an Account with Telegram and Chat with the Botfather–
First, download the Telegram app for desktop. Once that is done, you’ll need to interact with Telegram’s primary bot, the botfather. Quite a catchy name because all bots ever created in Telegram came from it. Search for it in the search tab.
To trigger a response, type /start on the botfather, which will give you a list of commands. We’ve included screenshots to show you how the process goes.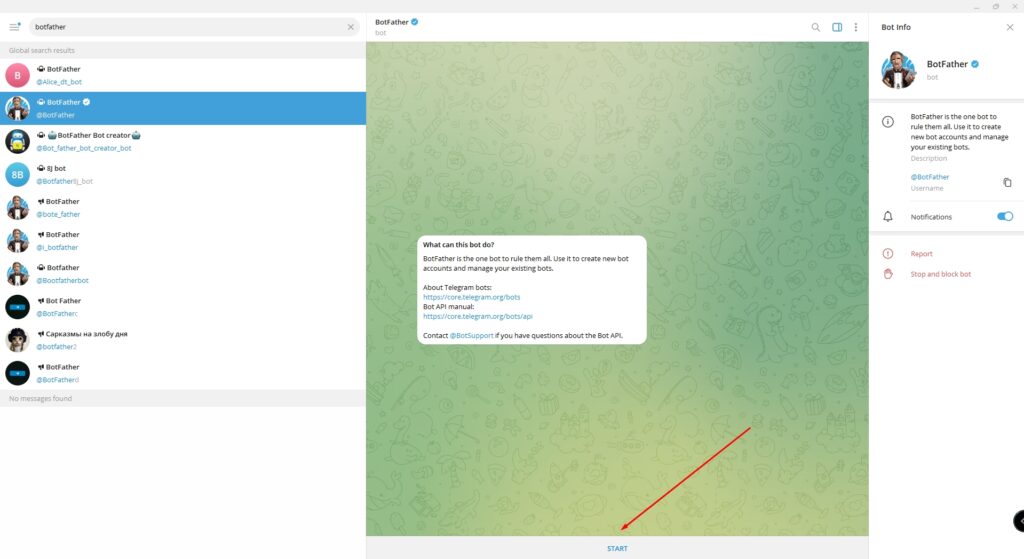
The command will request you to either create or edit your bots. Since you’re creating your first bot, click on /newbot. This takes us to the second step.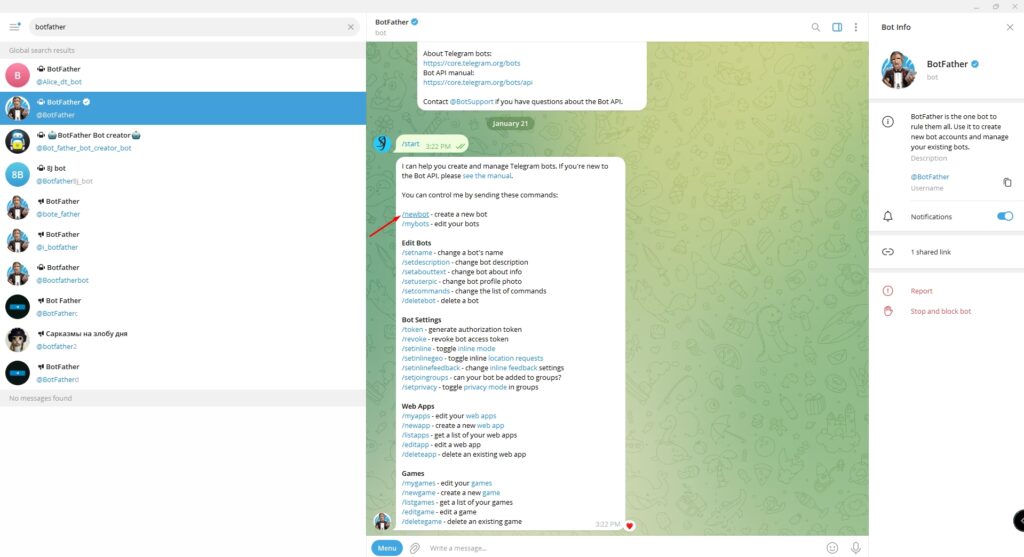
-
Create a Name and Username to Get your Token-
The /newbot command will ask you to name your bot and give it a username.
A name is what your subscribers will see in a conversation. They’ll find the bot through the username. It’s advisable to give the bot a friendly name that contains spaces, for instance, srijitb_bot.
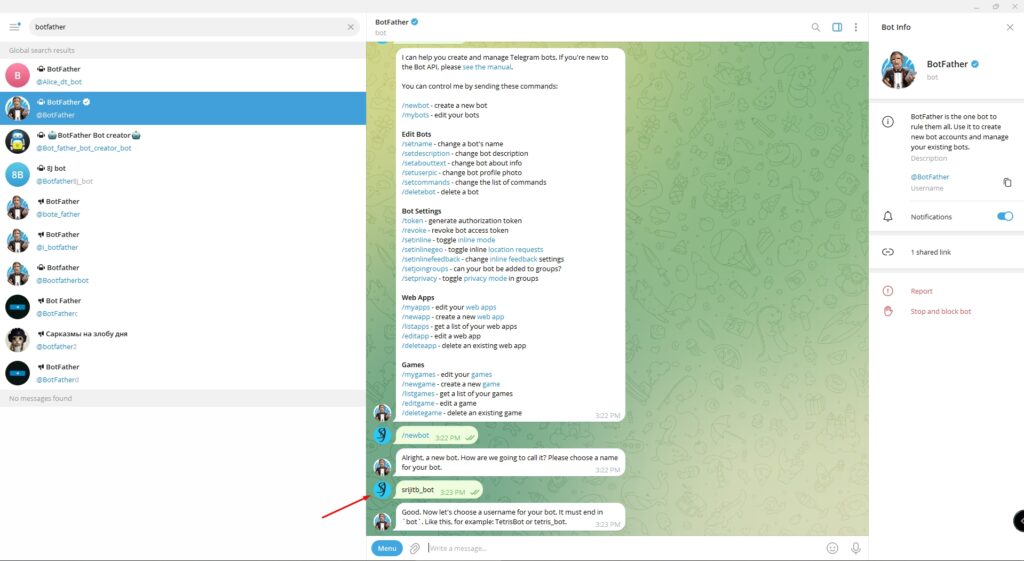
The username is different; it shouldn’t have any space and must have the word “bot” as the suffix. It should be between 5-32 characters and may include Latin, numbers, or underscores.
We gave our bot the username “srijitb_bot”
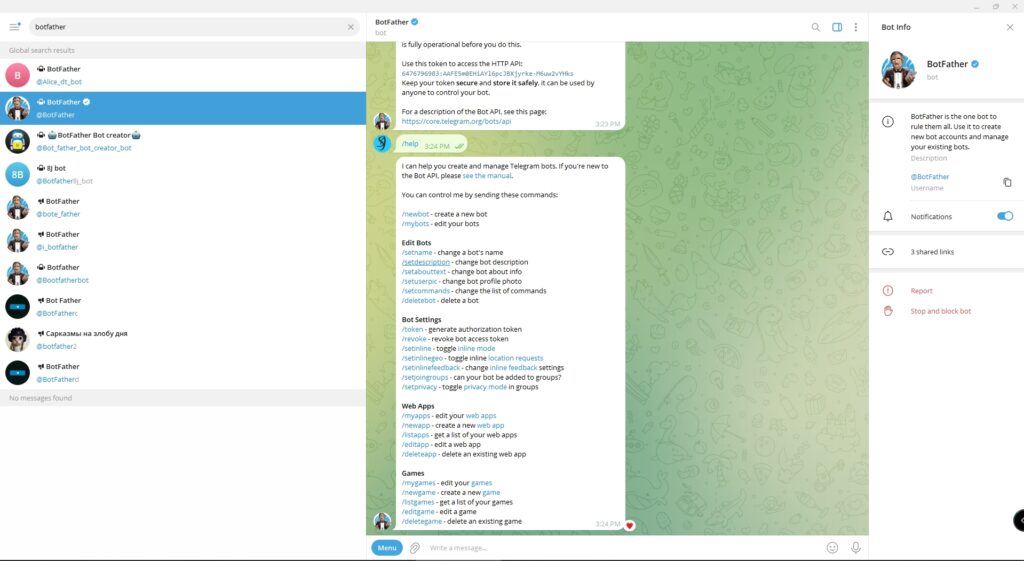
You get a token back after creating the username (The one concealed in red). The token is required to control the bot and send it to the Bots API. Keep it safe and don’t show it to anyone. Some people can do crazy stuff with your bot. You’ll need the token later. In case someone steals your token, or you lose it, leverage the token command to generate a new one. -
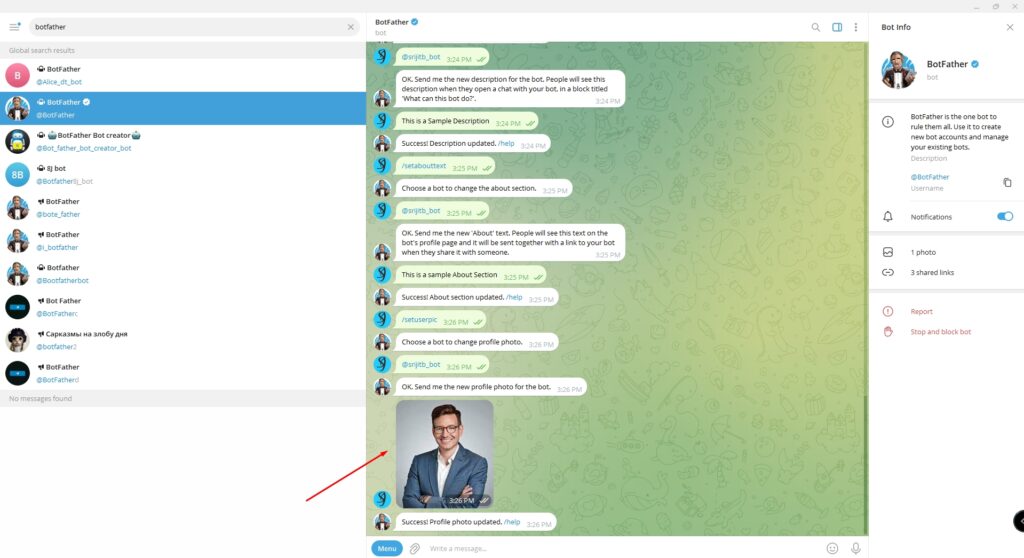
Customize the Bot – Add Profile Photo, About & Description
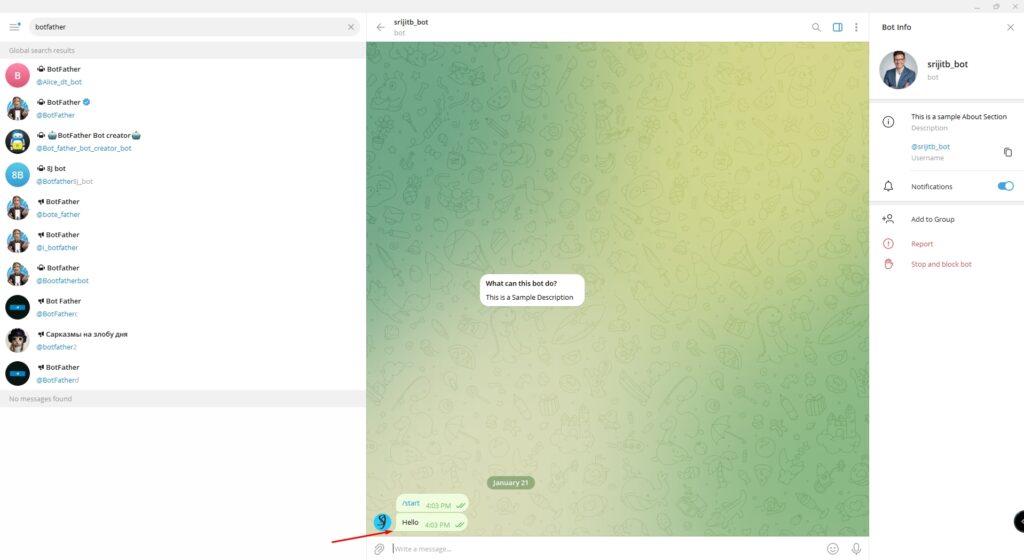
After creating the Bot – srijitb_bot we will customize the Bot’s Details including the profile picture, about and description. First we will issue /help command which will list all the commands which can be used with the Bot.
 First we will use /setdescription command which helps us to set a description for our Bot. After the command is issued, we need to select for which Bot we want to perform the operation, after the Bot is selected we will type in a description and press enter.
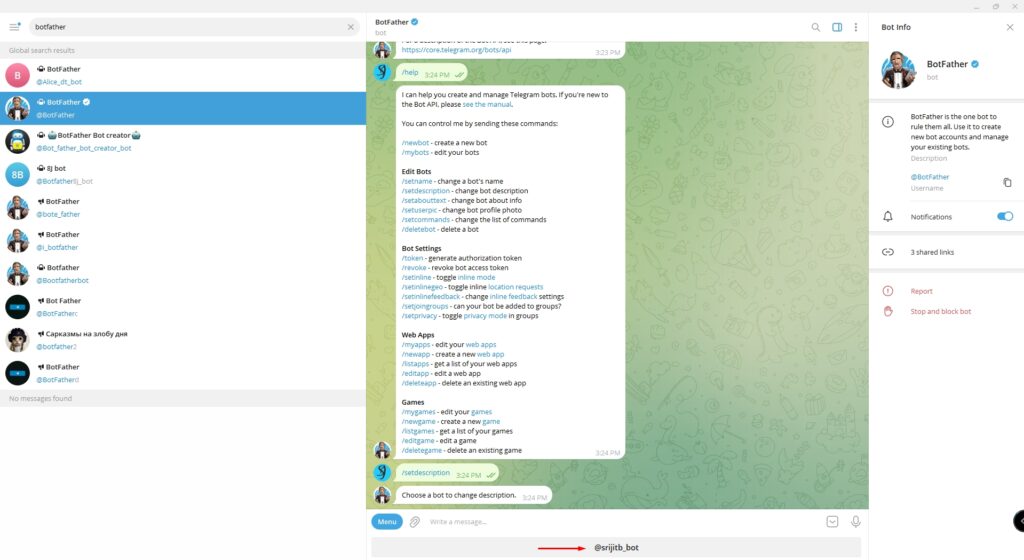 Next we will issue /setabouttext which will set a About Description of the Bot. After the command is issued, we need to select for which Bot we want to perform the operation, after the Bot is selected we will type in a description and press enter.
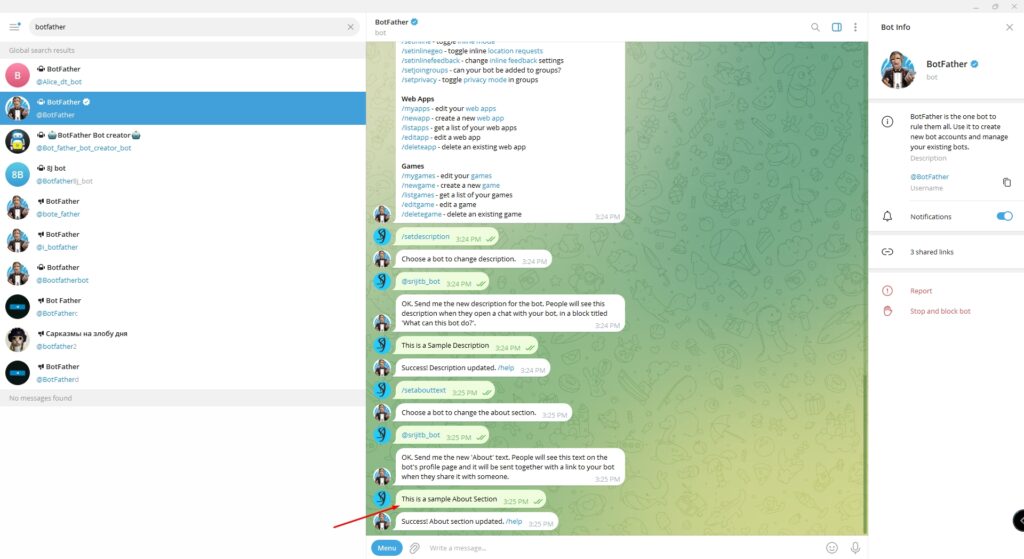 After that we will a nice profile photo for the Bot. To do so we will issue /setuserpic command. After the command is issued, we need to select for which Bot we want to perform the operation, after the Bot is selected we will attach a photo from our system and press enter.
After doing these changes, we can view our Bot with all the updated changes.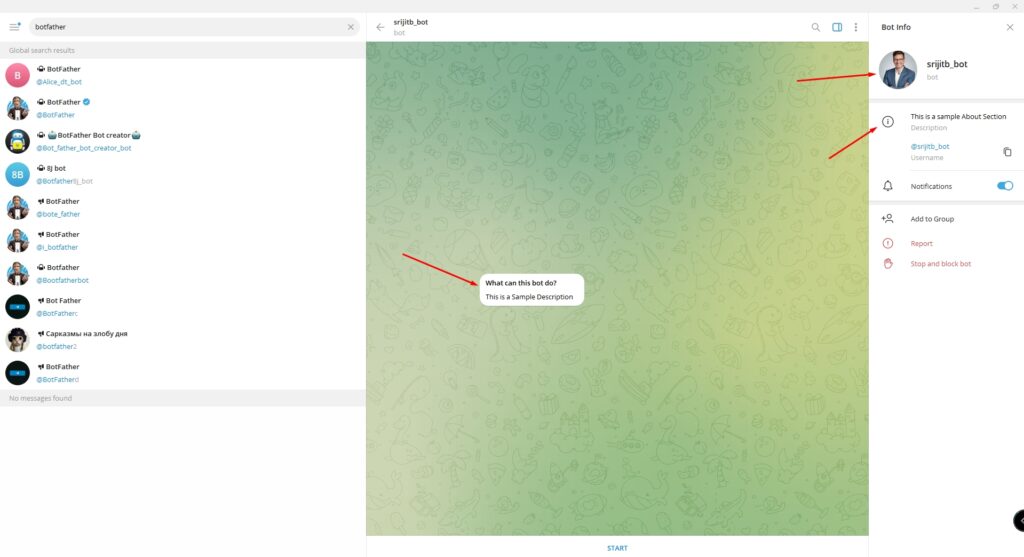
-
Next we have two scenarios how we want to use the Bot –
a) The Bot will send notification to a specific person. Example – Alerting a customer about their device status.
b) The Bot will send notification to a specific group. Example – Alerting a Network Operations Team about network outages. -
How to get chat_id for a specific User? (For Step 4a)
For this requirement we need to get the chat_id for the person to whom we want to sent the notification alert to. Follow the steps below to get the chat_id-
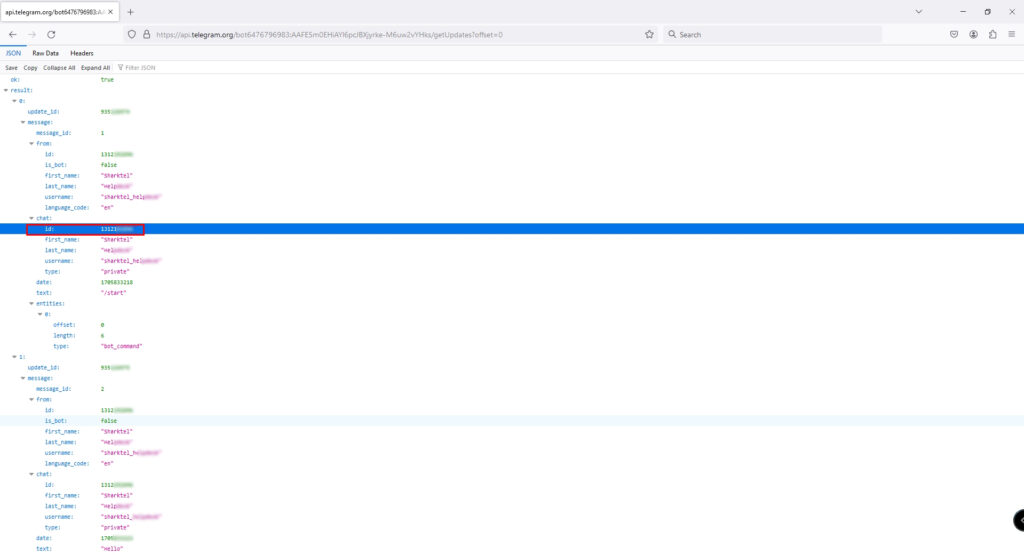
Method 1- Paste the following link in your browser. Replace <API-access-token> with the API access token that you identified or created in the previous section:https://api.telegram.org/bot<API-access-token>/getUpdates?offset=0
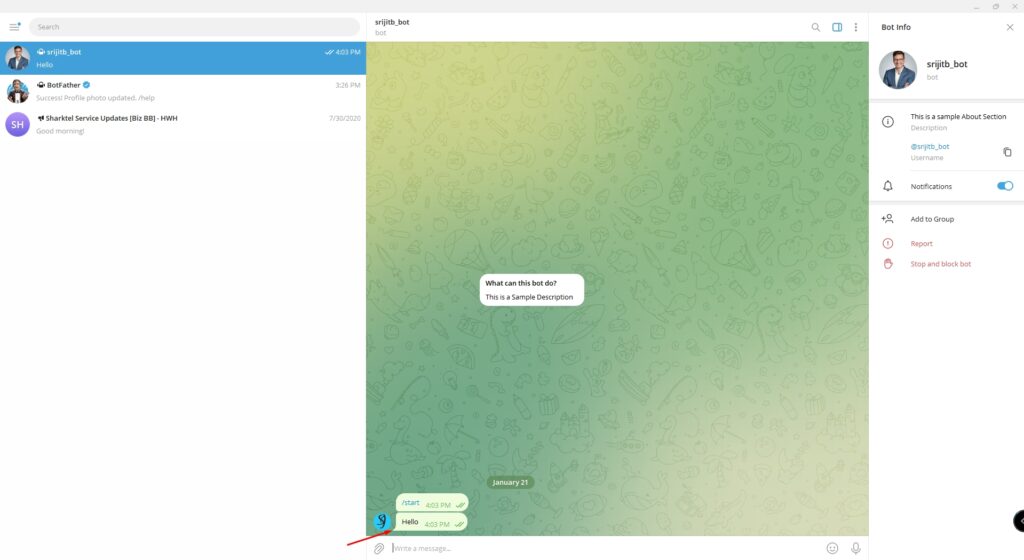
- Send a message to your bot in the Telegram application. The message text can be anything. Your chat history must include at least one message to get your chat ID.
- Refresh your browser.
- Identify the numerical chat ID by finding the id inside the chat JSON object. In the example below, the chat ID is 1312*****.
Method 2
- There are several bots available which can help you get your chat_id. For example we will use @myidbot
- After clicking start, we will click /getid

- It will display the chat_id
-
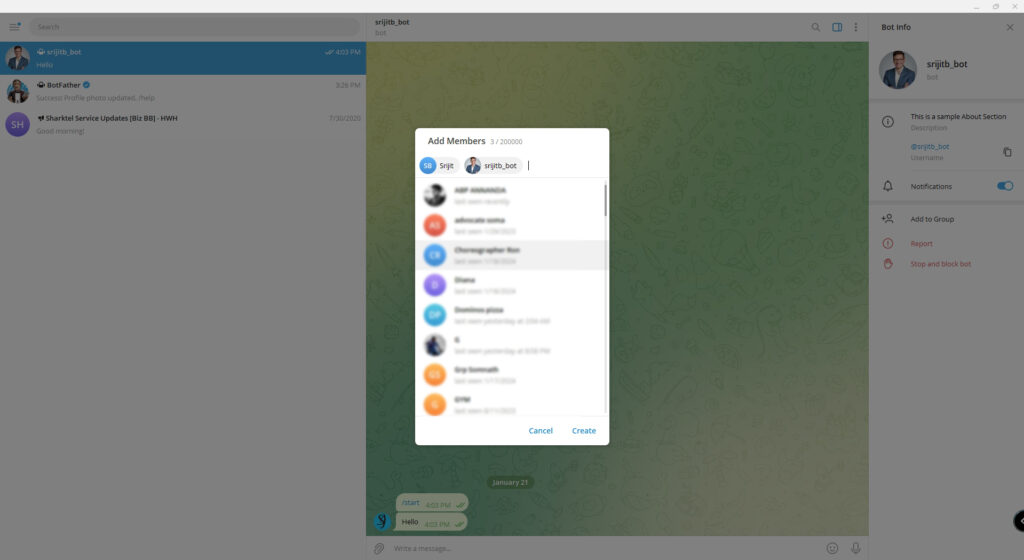
How to get chat_id for a specific Group? (For Step 4b)
1) First we will create a Telegram Group and give it a name.
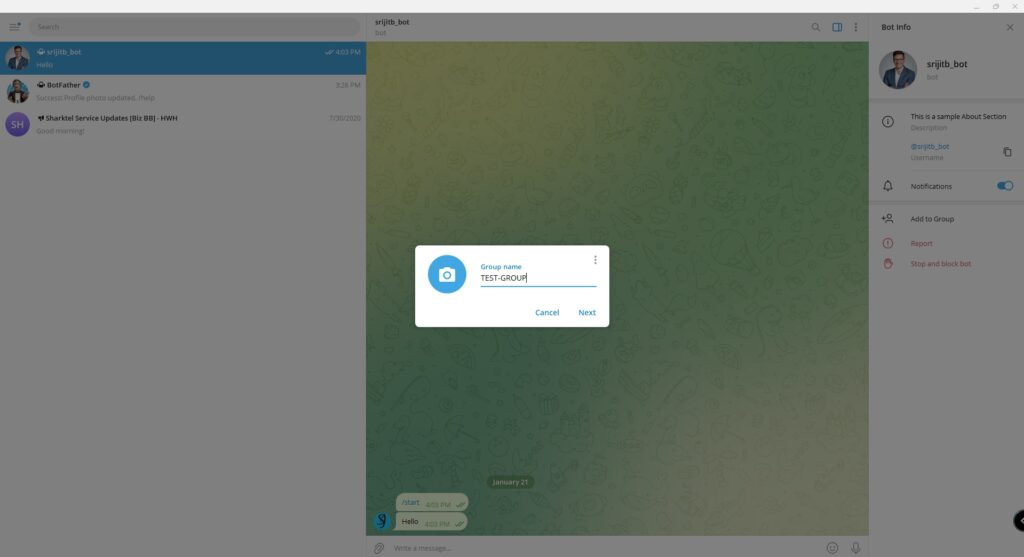
2) We will add group members inclusing our Bot.
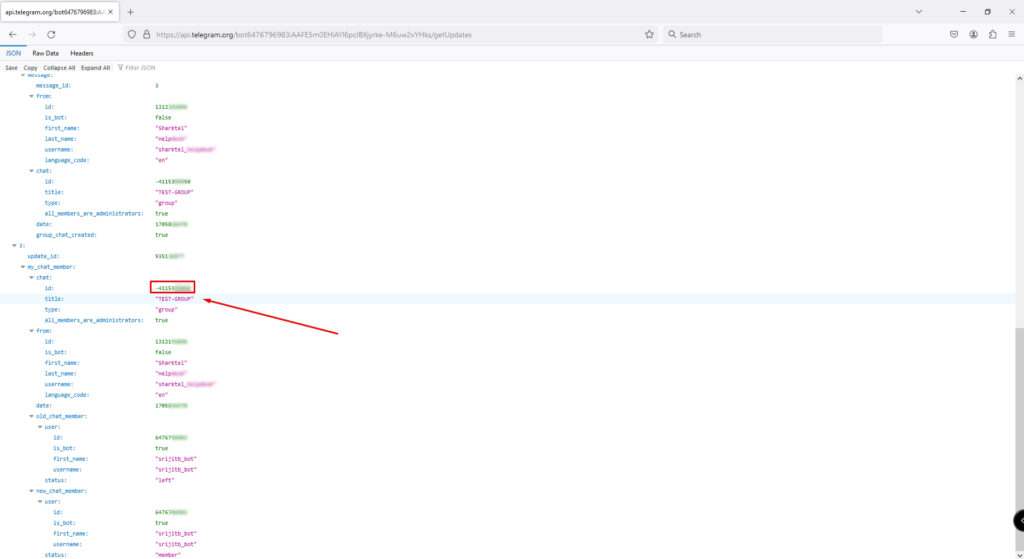
 Method1) After adding the Bot to our new created group, we will Paste the following link in your browser. Replace <API-access-token> with the API access token that you identified or created in the previous section: https://api.telegram.org/bot<API-access-token>/getUpdates?offset=0
2) Then under the chat object, we will see the group name and chat_ID. It is important to note the ‘-‘ symbol present before the chat_id.
Method 2
1) In your group add the bot – @getidsbot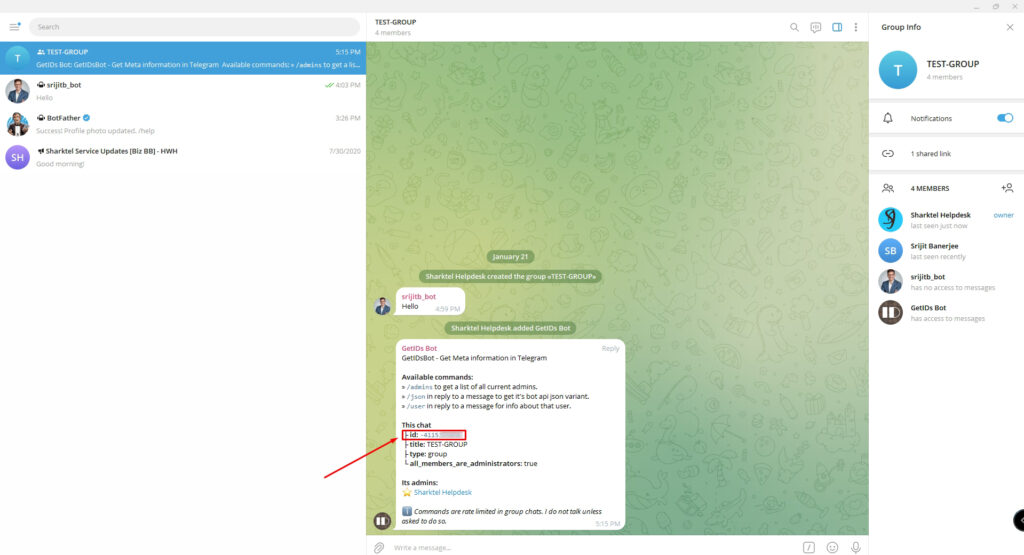
2) Once you add the bot, the group chat ID will immediately be displayed to you. -
Test sending messages to your chat_ids using the Bot
After you have the chat_id with you for the group or for the individual person, we can now test sending messages by going to – https://api.telegram.org/bot<API-access-token>/sendMessage?chat_id=-411XXXXXX&text=Hello
Replace <API-access-token> and chat_id with the API access token that you identified or created in the previous section
 Message is delivered successfully.
 -
Now, we will configure and connect telegram with PRTG
1) Login to PRTG Server. If you need help in isntallation you may look into this blog post – . Then Goto Setup -> Notification Templates.
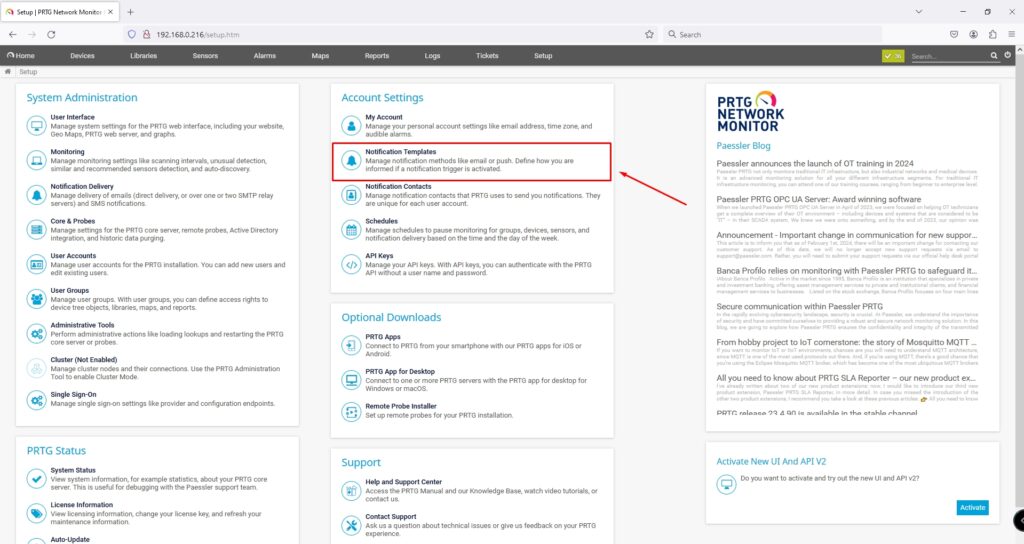 Click on Add.
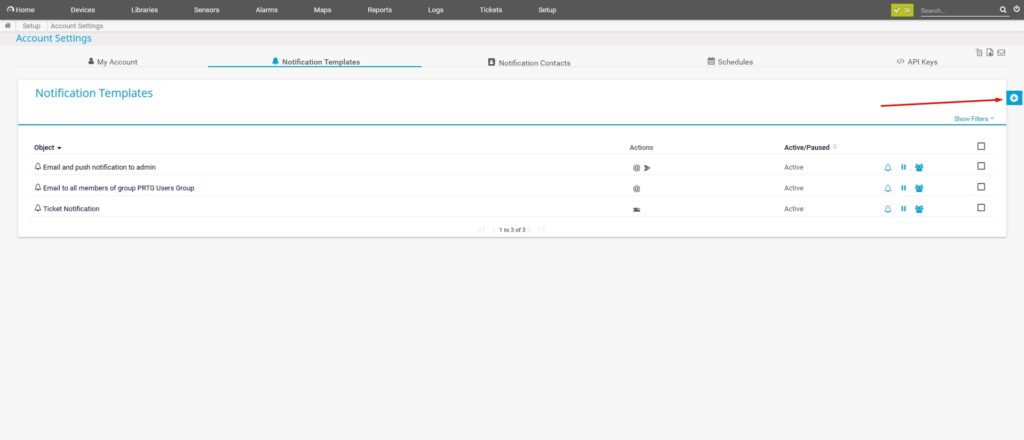
2) Give a Template Name – Telegram Notification.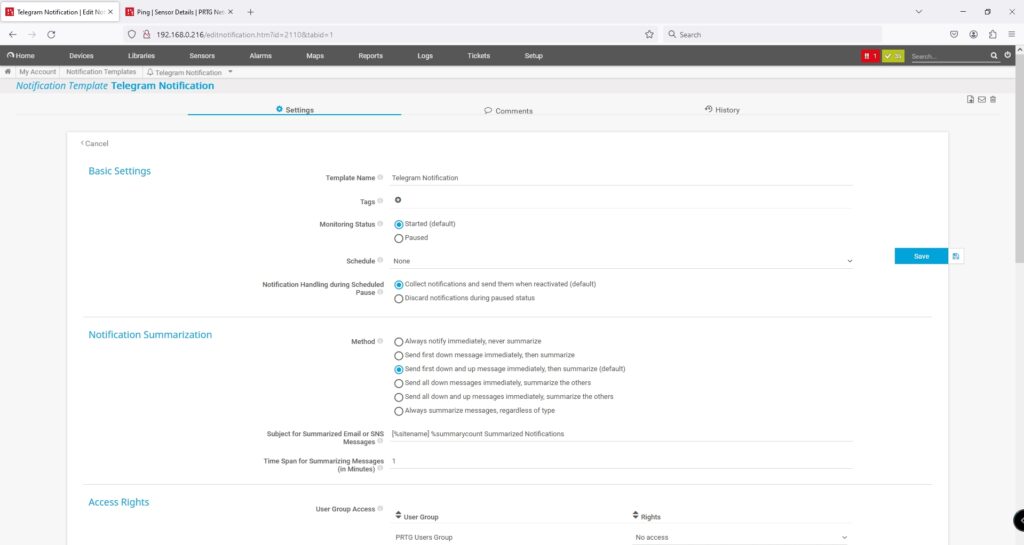 Then add the following under Execute HTTP Action –
URL – https://api.telegram.org/bot<API-access-token>/sendMessage (Replace <API-access-token> and <chat_id> with the API access token that you identified or created in the previous section)
HTTP Method – POST
Payload –chat_id=<chat_id>&text=
There’s a *%status* sensor in your PRTG!
[%sensor](%linksensor)*Device* %device
*Last Message* %lastmessage
*Down since* %since
*Group* %group
*%down*&parse_mode=Markdown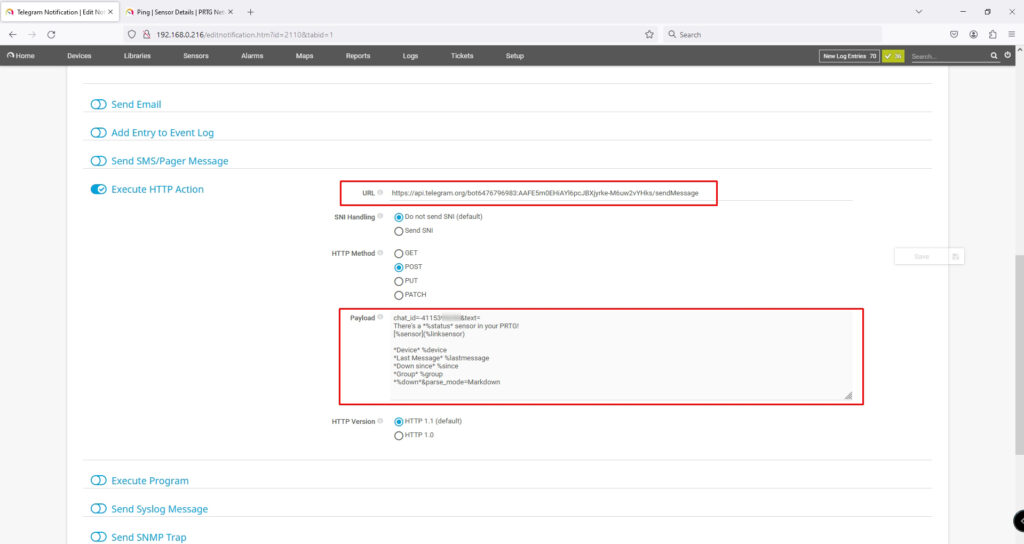 3) Click on Save. For Customisation of Messages or Text Formating, you may check Telegram API Guideline and PRTG Variables
4) Now, if you try to test the notification template, you may not receive the test message as you will get error –{“ok”: false,“error_code”: 400,“description”: “Bad Request: text must be encoded in UTF-8”}
But, don’t worry when Actual Alert will be sent, it will be delivered successfully.
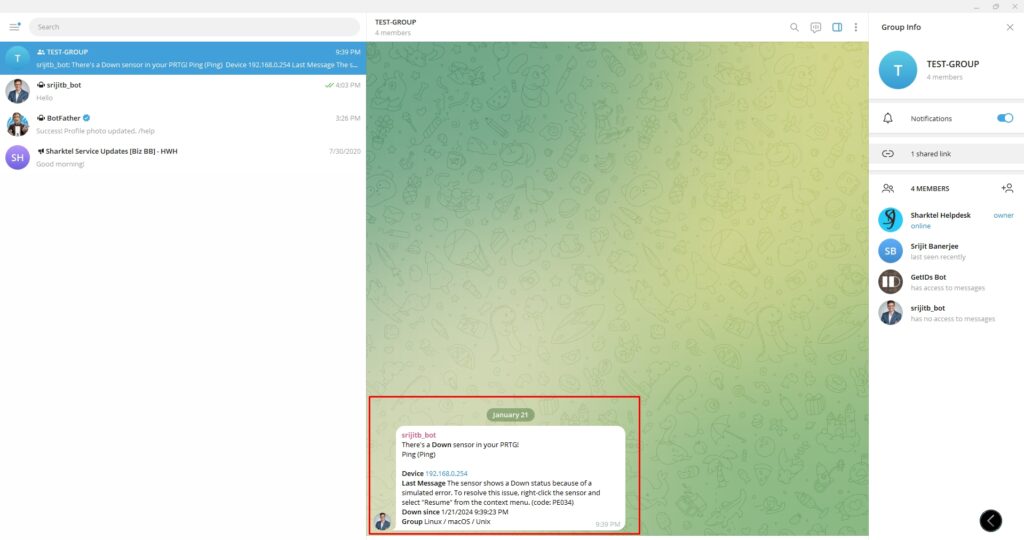
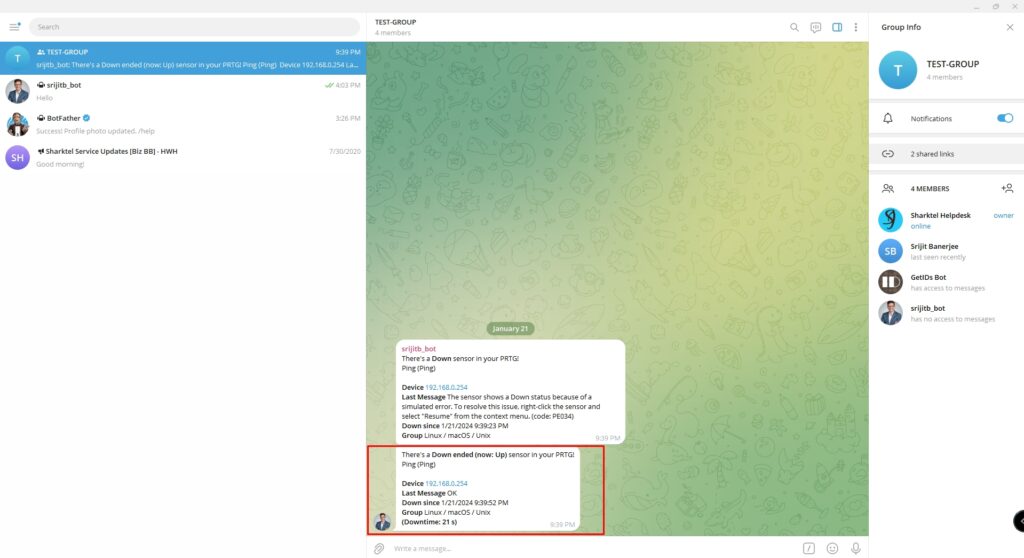
5) To, test the notification delivery, Right Click on any sensor, For example ping and select Simulate Error Status. You will immediately get Telegram Alert.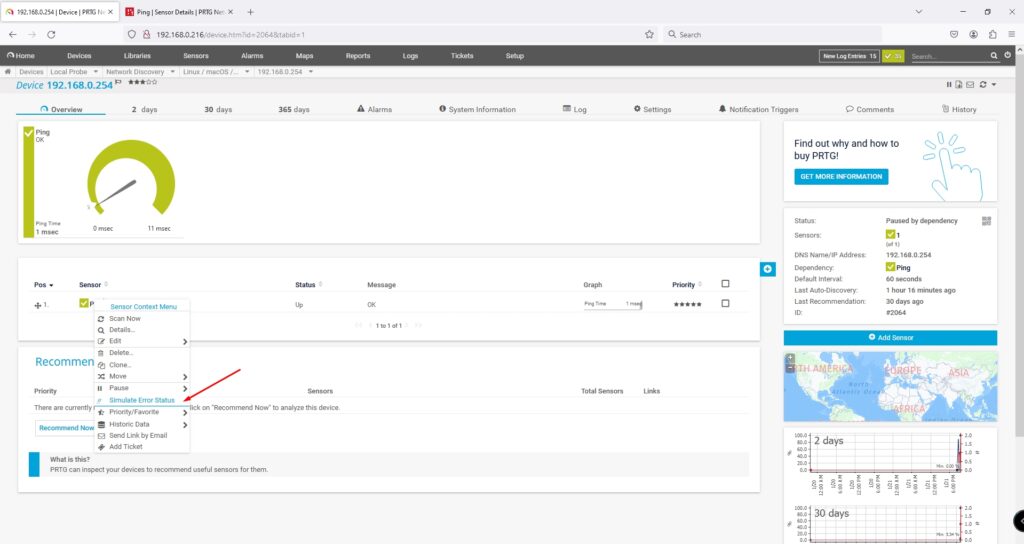
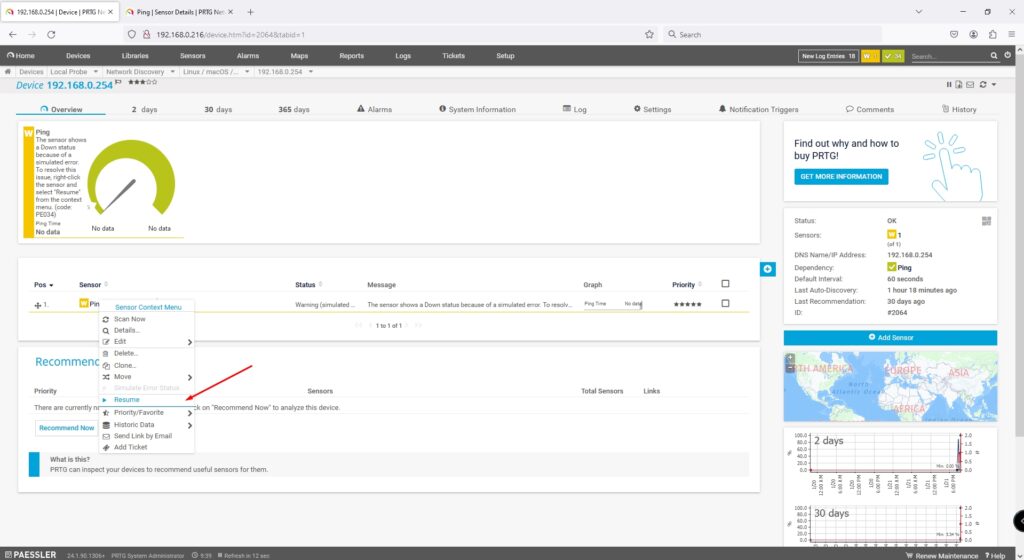
6) Then again right click on the sensor and click Resume. You will immediately get Telegram Alert.
9. Attach the Notification Template as per your requirement
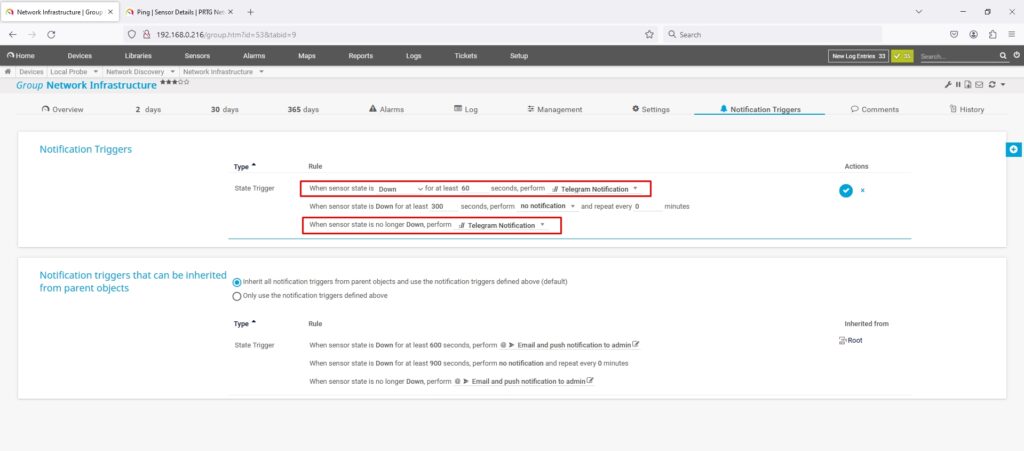
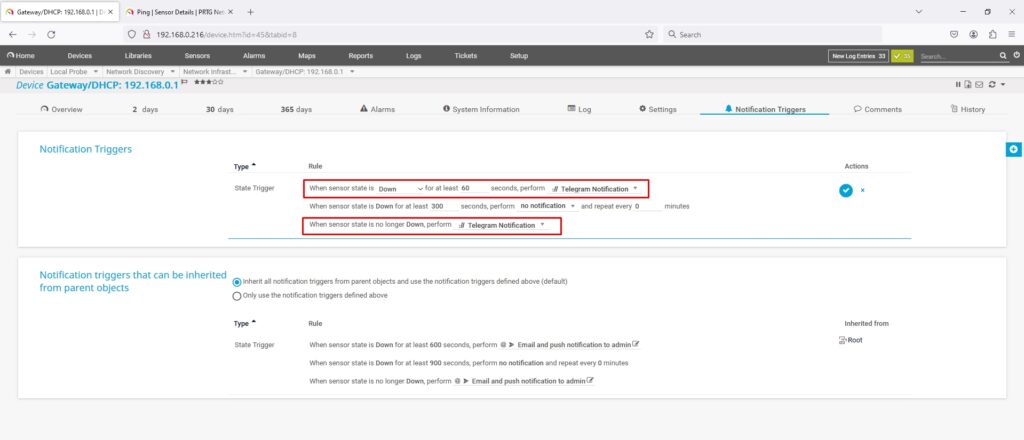
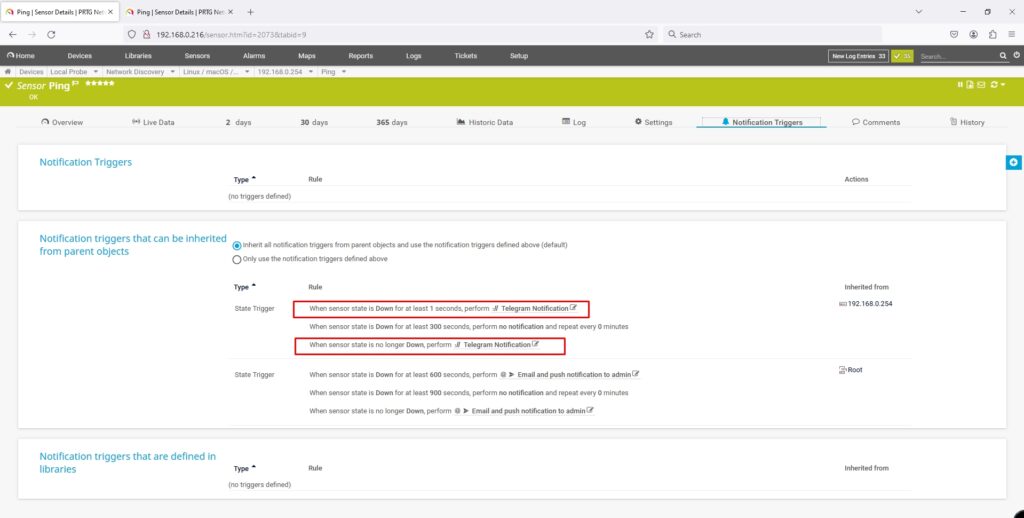
Now, based on your requirement, you may connect telegram with PRTG to your Device Group, Specific Device or any Specific Sensor.
1) Device Group
2) Specific Device
3) Specific Sensor
Now, you can connect telegram with PRTG if you have successfully followed the step by step guide. For any further queries, please drop a comment and I’ll connect soon.