Hello everyone, in this tutorial we are going to see how to set up your own SMS Gateway using playSMS & Gammu. I am writing this post after getting inspired from Mr. Syed Jahanzaib blog. Also, I must thank Mr. Anton Raharja for creating such a wonderful easy-to-use application – playSMS.
My main intention in writing this blog post is to make people aware of this useful application and help them setup their own sms gateway conveniently. I have mostly followed instructions from playSMS original documentation though there are some modifications to suit my needs. Let’s begin…
What is playSMS?
playSMS is a free, opensource web based SMS Management platform having several features like sending/receiving sms, sms poll, sms quiz and much more. [Find more about it here]
What is Gammu?
Gammu is also a free, open source command line utility, which you can use to control your phone. It can be used for SMS retrieval, backup, phonebook access and much more. It can communicate directly with mobile devices including phones and dongles. [Find more about it here]
Preparing your Ubuntu Server 15.04 for the installation of playSMS application:
For knowing detailed requirements about playSMS installation you can go through playSMS documentation here.
I used the following hardware & software for this demonstration purpose (completely virtualized under ESXi):
- Dual Core CPU
- 2 GiG RAM
- 16 GB HDD
- 1 gbps NIC
- Ubuntu Server 15.04 x86
Installation Procedure for LAMP stack and fulfilling basic requirements for further installation of playSMS:
- Get into SuperUser mode.
sudo su
- Update & Upgrade your Ubuntu Server
apt-get update
apt-get upgrade
- Install LAMP Stack & phpmyadmin
apt-get install apache2 libapache2-mod-php5 mysql-server php5 php5-cli php5-mysql php5-mcrypt php5-gd php5-imap php5-curl phpmyadmin
- Enable mcrypt extension manually
php5enmod mcrypt
- Restart Apache Web Service
service apache2 restart
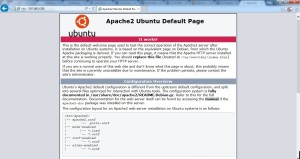
- Verify web server by browsing – http://[IP Address of your Ubuntu Server]


