Okay, so you have been through some comparatively easy steps but now is the ultimate step leading you to the final configuration of your server using Gammu gateway. So, have patience and configure it step by step..
For this demonstration, I will be using ZTE MF 190 dongle with a SIM Card.

Also I would like to say that since I am working in a virtualized environment there are some passthrough options required. Though I will go through those steps, you can ignore if you don’t use ESXi. Unfortunately my hardware did not support Passthrough option directly (Direct I/O) so I had to mount my USB of another PC to my server.

Steps for mounting USB in vSphere Client:
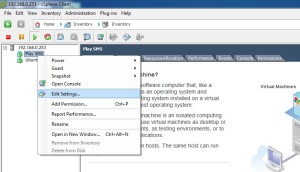
- Open VMWare vShphere Client.
- Right click on the VM name and click Edit settings.
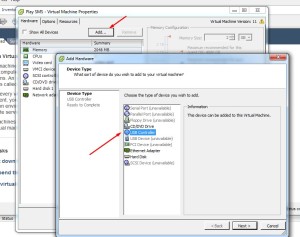
- Click Add –> Select USB Controller. –> Next
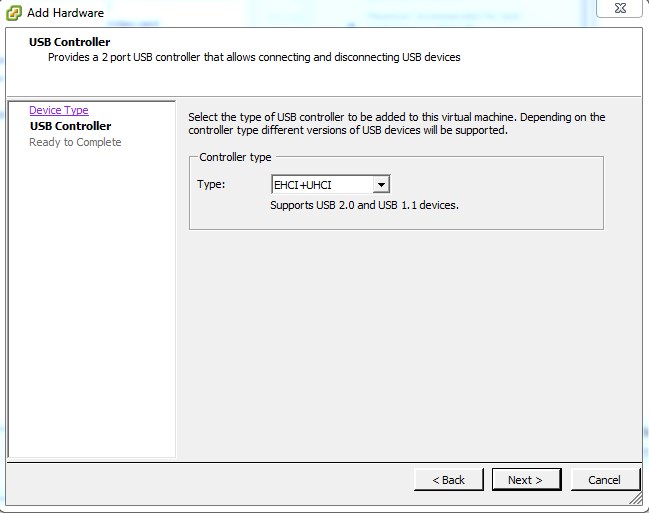
- Click Next

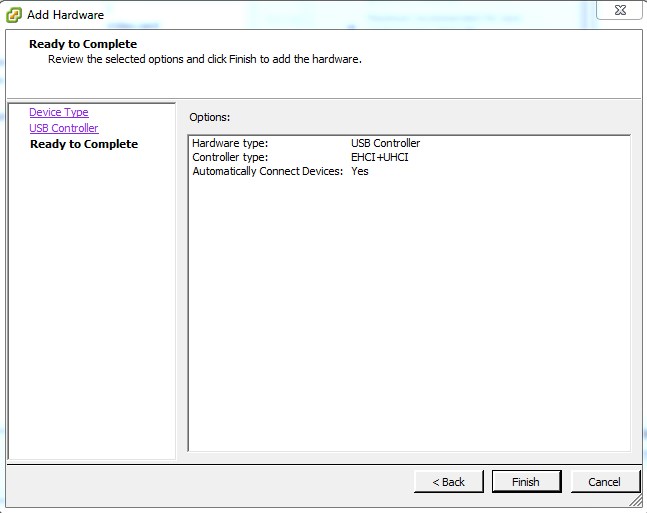
- Click Finish

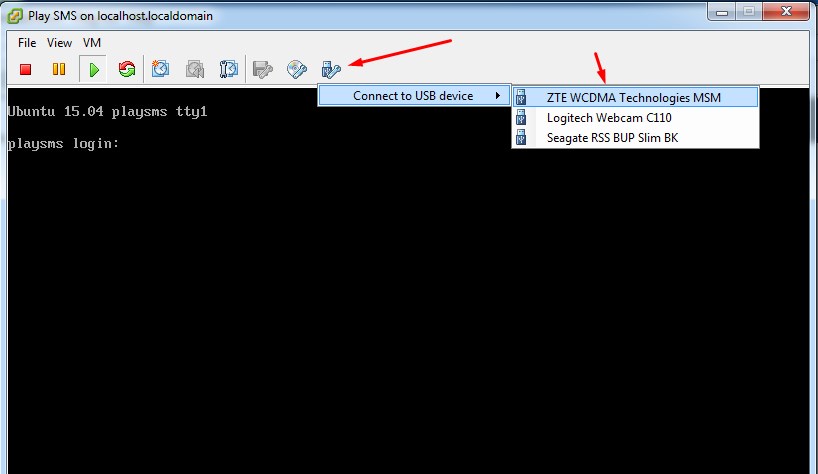
- Open VM Console. Click on USB icon. Select the Dongle from the list. In my case ZTE.


Detecting & Identifying our modem:
- Download wvdialconf tool.
apt-get install wvdial
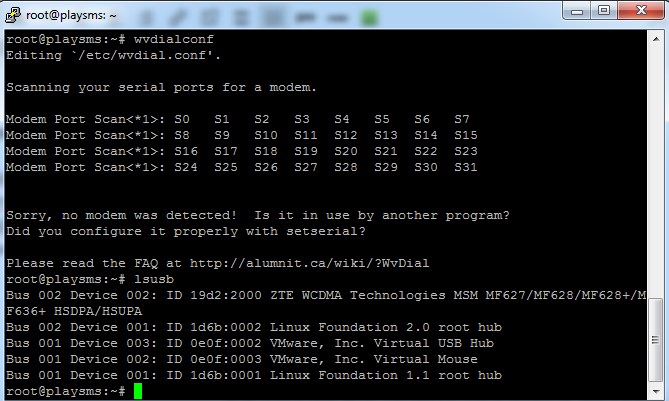
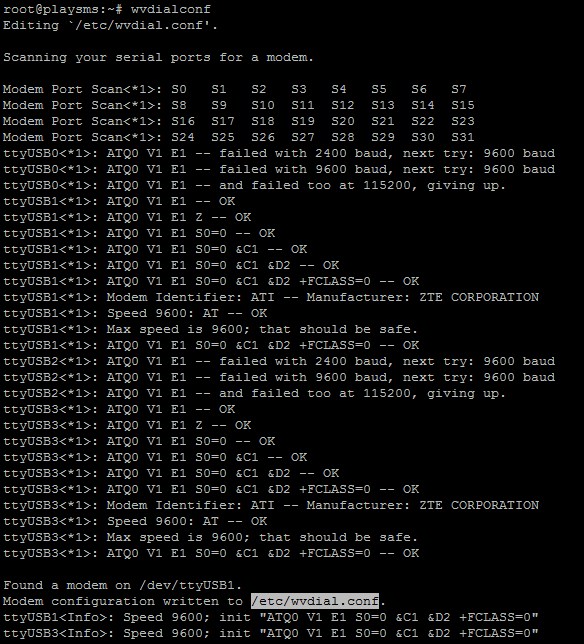
- Issue wvdialconf to identify modem.
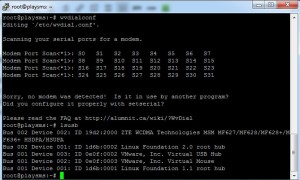
- In my case no modem was detected. But issuing lsusb produced the following. That means the device is connected to host successfully. Now if your device is not detected also, follow the steps below but I cannot guarantee it will work for other vendors too apart from ZTE.
- Install USB Modeswitch
apt-get install usb-modeswitch
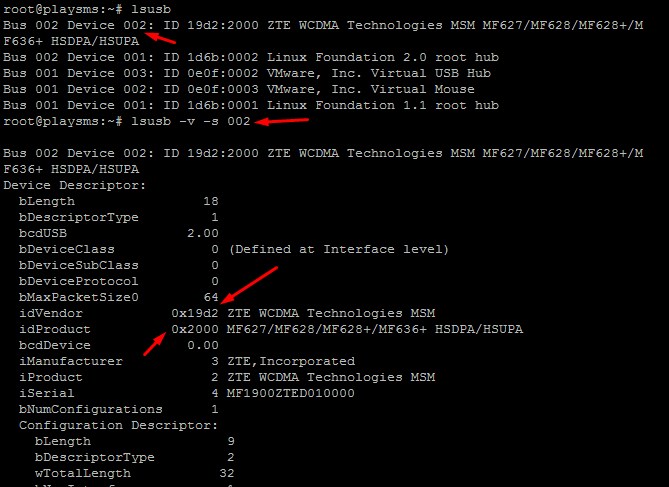
- Find the details of your modem using lsusb, note down the device ID. Then issue the following
lsusb -v -s [ID].
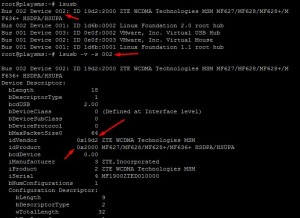
- Note down product ID and vendor ID.
- Then change USB mode using the following command. Refer usb_modeswitch manual for more details.
usb_modeswitch -W -v 19d2 -p 2000 -M "5553424312345678000000000000061b000000020000000000000000000000"
In the above statement -v denotes Vendor ID & -p denotes Product ID which you have noted in step 5.
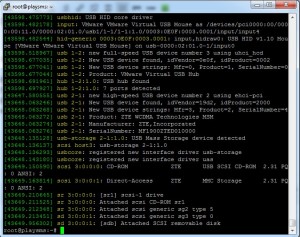
- Again issue lsusb command and note the changes.

- Again issue the wvdialconf and now you will see that the modem will be detected now.
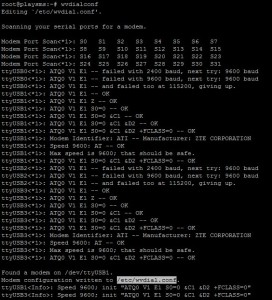
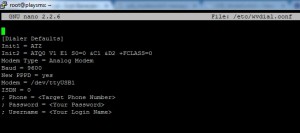
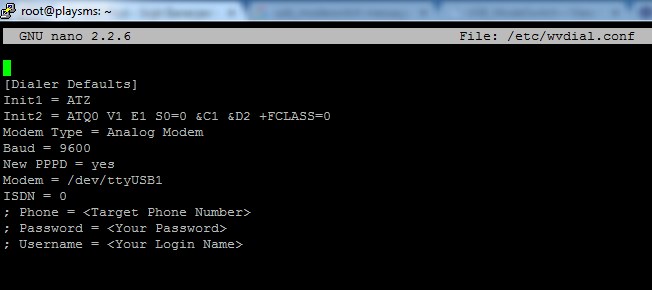
- Open the configuration file where your modem details will be saved. Note the Modem Value.
nano /etc/wvdial.conf


Procedure for installing Gammu:
- Enter into super user mode.
sudo su
- Install Gammu
apt-get install gammu gammu-smsd
- Create necessary directories
mkdir -p /var/log/gammu /var/spool/gammu/{inbox,outbox,sent,error} - Setup Gammu spool directories owner and permission
chown www-data:www-data -R /var/spool/gammu/*
- We’ll get example of gammu-smsdrc from playSMS package and copy to /etc/
wget -c https://raw.githubusercontent.com/antonraharja/playSMS/master/contrib/gammu/linux/gammu-smsdrc
 cp gammu-smsdrc /etc/
- Edit the configuration file
nano /etc/gammu-smsdrc
- Edit port and connection only with the values noted in step 10 of Modem Detection.
- Create a symbolic link using the following command(IMPORTANT)
ln -s /etc/gammu-smsdrc /etc/gammurc
- Use the following command to detect modem using gammu.
gammu -f /var/log/gammulog identify
- Change the user in the daemon configuration file. It is by default gammu user. I don’t have any user with that name. So I changed it to root.
nano /etc/init.d/gammu-smsd
Edit USER=gammu to USER=root
- For testing purpose, issue gammu send sms commandline
gammu sendsms TEXT [Receiver Phone No.] -text "Hello World!"
- Start Gammu.
/etc/init.d/gammu-smsd start
- Now add gammu to rc.local for auto starting it.
nano /etc/rc.local
Add /etc/init.d/gammu-smsd start before exit 0
- Verify if gammu service is running.
ps ax | grep -v grep | grep gammu-smsd
- Monitor Gammu smsd log file
tail -f /var/log/gammu/smsd.log
- Then login into playSMS via web browser. From settings –> Manage Gateway & SMSC, Click on Gammu Settings.
- Copy the folder path.
- Then Click on “+” Symbol after Gammu. Create a SMSC.
- Then from Settings -> Main Configurations -> Default SMSC -> Select Gammu.
- Compose an SMS via playSMS.