Paessler PRTG is an excellent tool for monitoring your network infra and devices. It has both trial and paid versions with sensor count limitations. Once you are done setting up of the server, it is essential to take Back Up of your server at regular intervals so that you can restore the configurations on new hardware in case of any emergency. In this PRTG Back Up & Restore tutorial I will show you how to take manual backups of your PRTG Server and restore it later with all the data and configuration files.
YouTube Video Link – https://www.youtube.com/watch?v=Fp92-5LXVz4
How to install PRTG Server?
- Download PRTG Server from the official PRTG Webite. A 30 day trial version will be download.
- Enter your email ID during installation. Then select Express (Recommended). Click Next.
- After the installation is completed, the PRTG Web Panel will open automatically on localhost (http://127.0.0.1).
- Then you can login using PRTG Default Username and Password – prtgadmin/prtgadmin.
- During the first time operations, auto discovery will take place. Add some sensors as per your choice like this.
How to Back Up PRTG Data & Configurations?
- The first step for this guide on PRTG Back Up & Restore is to take the back up from the main server. Open PRTG Administration Tool. Click on Service Start/Stop. Stop both the services on the Master Server.

- Copy the following files from the PRTG Installation Directory to an external drive / Netwotk Drives –
The following folders in the PRTG program directory may contain your custom files that you must also move to the target system. The paths apply to a PRTG installation on a 64-bit Windows:- Custom sensor files:
%programfiles(x86)%\PRTG Network Monitor\Custom Sensors - SSL certificate for the PRTG web server:
%programfiles(x86)%\PRTG Network Monitor\cert - Device templates:
%programfiles(x86)%\PRTG Network Monitor\devicetemplates - .oidlib files:
%programfiles(x86)%\PRTG Network Monitor\snmplibs - MIB files:
%programfiles(x86)%\PRTG Network Monitor\MIB - Custom notifications:
%programfiles(x86)%\PRTG Network Monitor\Notifications - Custom map objects:
%programfiles(x86)%\PRTG Network Monitor\webroot\mapobjects - Custom map background images:
%programfiles(x86)%\PRTG Network Monitor\webroot\mapbackground - Custom lookup files:
%programfiles(x86)%\PRTG Network Monitor\lookups\custom - Custom device icons:
%programfiles(x86)%\PRTG Network Monitor\webroot\icons\devices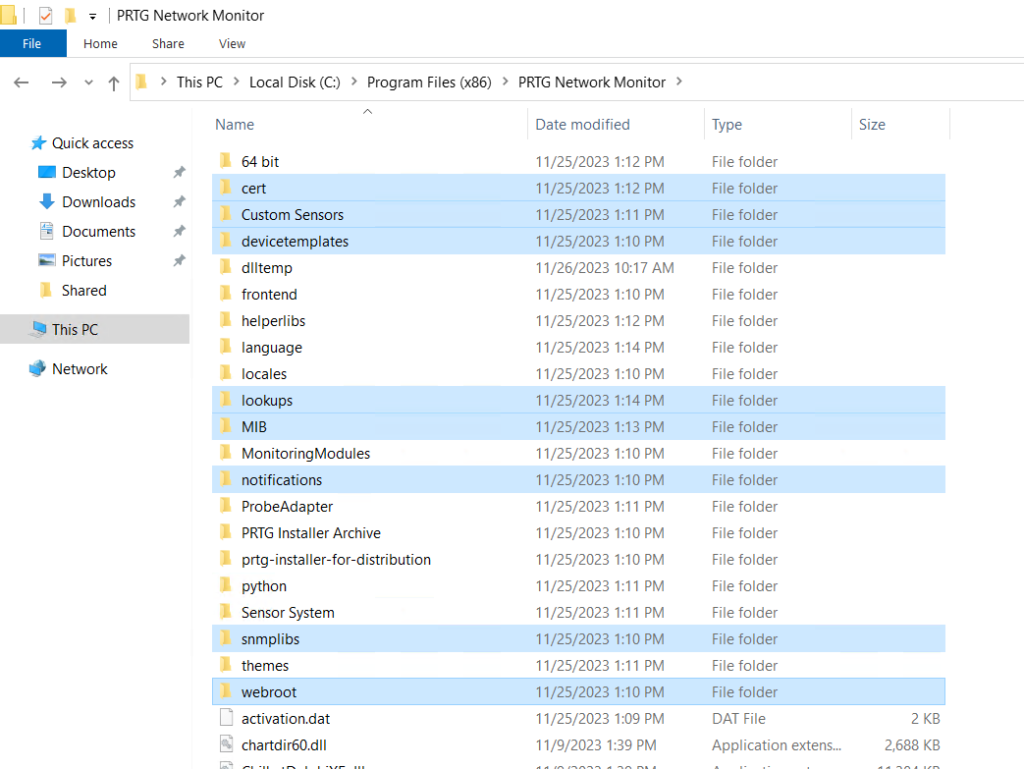
- Custom sensor files:
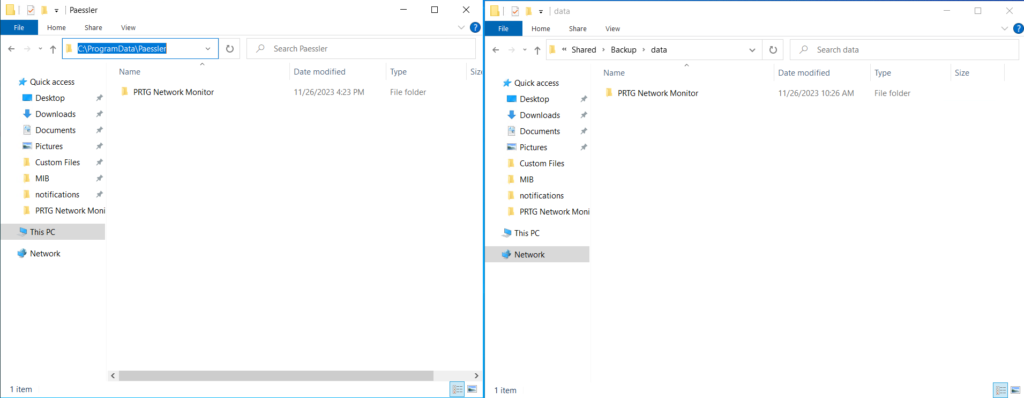
- Then Copy the all the PRTG data files from the location to an external drive / Netwotk Drive –
%programdata%\Paessler\PRTG Network Monitor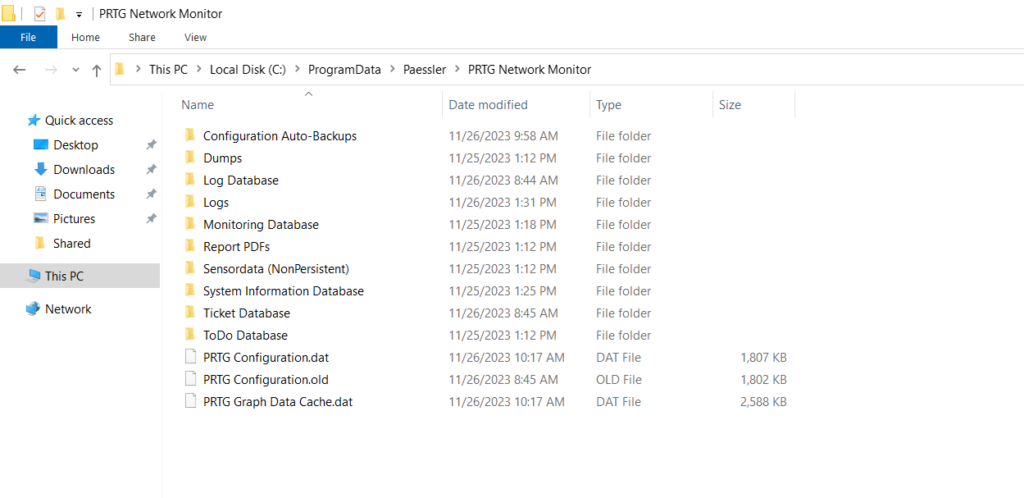
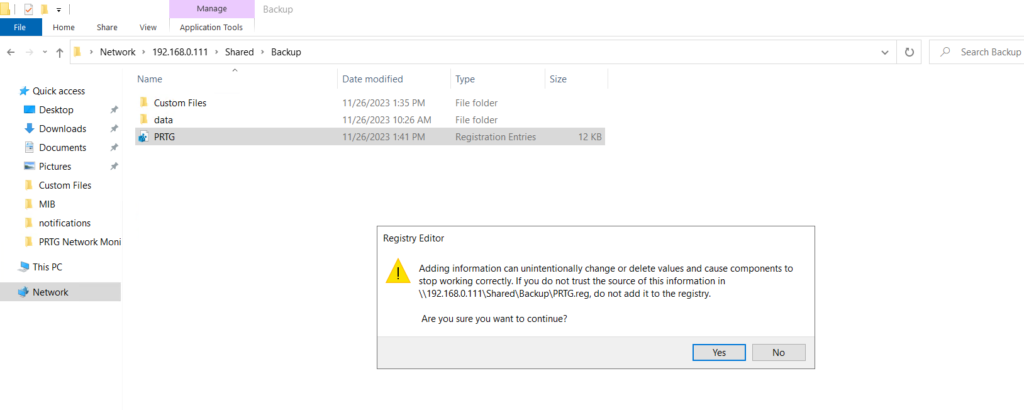
- Next export the settings of the source system and the local probe from the Windows registry to a file. On the source system, open the Windows registry editor and navigate to the PRTG registry key. HKEY_LOCAL_MACHINE\SOFTWARE\Wow6432Node\Paessler\PRTG Network Monitor
Right-click PRTG Network Monitor and Export the selected branch to a .reg file.
Then export the file to an external drive / Netwotk Drive.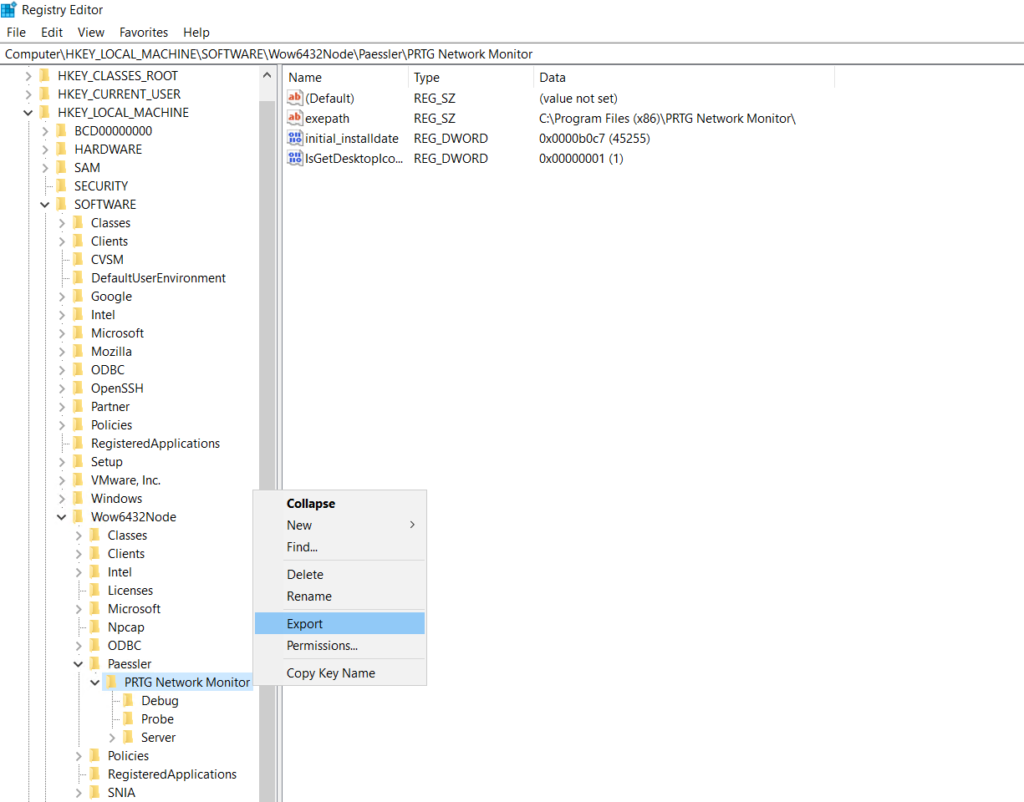
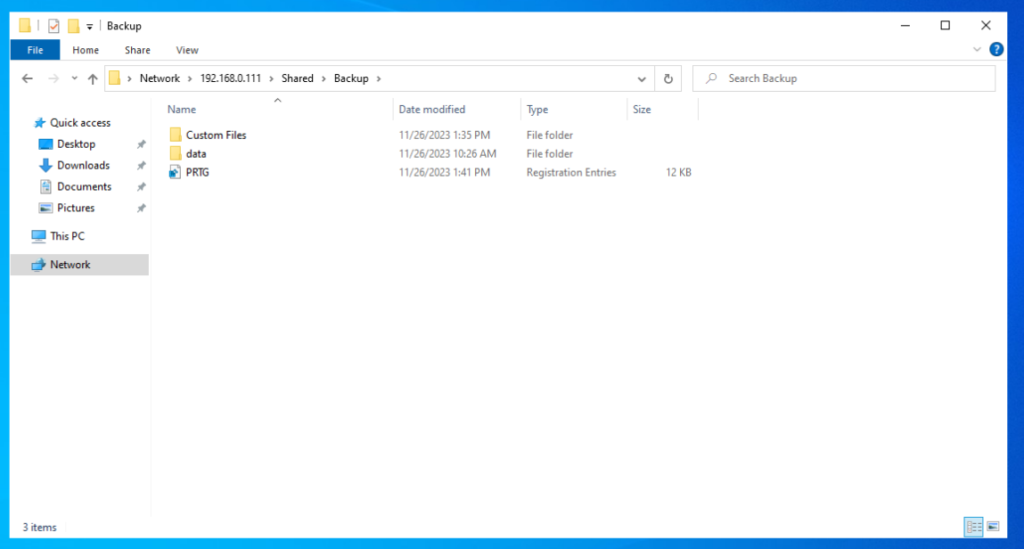
- Your final backup folder should now contain the following files.
How to Restore PRTG Data & Configurations?
- Here comes the last part of the guide on PRTG Back Up & Restore. Now, on the new server, Open PRTG Administration Tool. Click on Service Start/Stop. Stop both the services.

- Then on the New Server, paste the PRTG program directory files as copied from the master server.
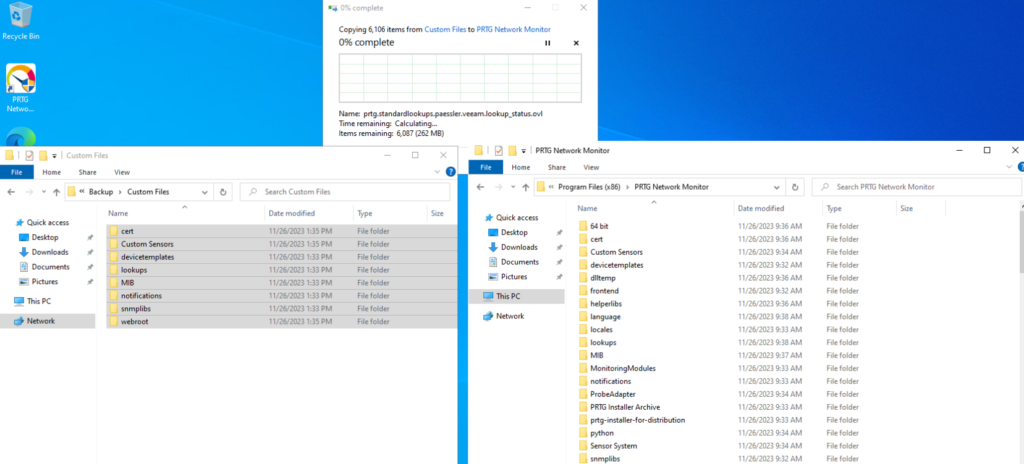
- Paste the PRTG Data Directory files as copied from the master server.
- Import the .reg file on the new server. After opening the .reg file click on yes for confirmation.
- Open PRTG Administration Tool. Click on Service Start/Stop. Start both the services.
- Now, your backup should be successfully restored.
YouTube Video Link – https://www.youtube.com/watch?v=Fp92-5LXVz4
Reference:
https://kb.paessler.com/en/topic/523-how-do-i-back-up-all-data-and-configuration-of-my-prtg-installation
https://kb.paessler.com/en/topic/12313-how-do-i-restore-a-previous-configuration-of-prtg-from-automated-backup-zips

