While deploying logging and authentication solution for a company, I came across a very interesting technology called TACACS + and Syslog. Though I have worked with Syslog previously but TACACS was a new protocol for me. Now, why suddenly someone would deploy these two protocols and also at the same time? Yes… you guessed it right – SECURITY was the main reason behind the deployment of these two.
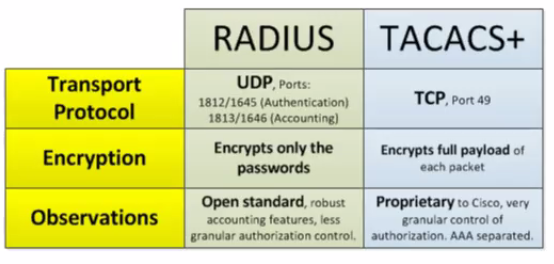
First of all TACACS is an Authentication, Authorization and Accounting (AAA) server used for centralised authentication of users for device management unlike RADIUS servers used mainly for user authentication for wire and wireless network access.
Coming to the syslog portion, I can definitely say that all network admins must implement syslog server for better monitoring of their devices and take immediate action on any emergency incident. You won’t believe what I found after I enabled syslog for one of our cisco switch – NUMEROUS BRUTE-FORCE ATTACKS !!! Those attacks generated mainly from China and Hong Kong based IP Address. We all know that there are 7 types of facility. A facility is used to specify what type of program is logging the message. This lets the configuration file specify that messages from different facilities will be handled differently. The list of facilities available are:
| Value | Severity | Keyword | Description / Examples |
|---|---|---|---|
| 0 | Emergency | emerg | Multiple apps/servers/sites. This level should not be used by applications. |
| 1 | Alert | alert | Should be corrected immediately, An example might be the loss of the primary ISP connection. |
| 2 | Critical | crit | May be used to indicate a failure in the system’s primary application. |
| 3 | Error | err | An application has exceeded it file storage limit and attempts to write are failing. |
| 4 | Warning | warning | May indicate that an error will occur if action is not taken, For example a non-root file system has only 2GB remaining . |
| 5 | Notice | notice | Events that are unusual but not error conditions . |
| 6 | Informational | info | Normal operational messages -no action required. Example an application has started, paused or ended successfully. |
| 7 | Debugging | debug | Info useful to developers for debugging the application. |
Now, if you want to know more about about these protocols just Google it and you will find a whole lot of resources.
Tools Required:
1) Kiwi Syslog Server (Trial/License required)
2) TACACS + Server (Free)
3) GNS3 Server with 7200 IOS (just for lab)
Steps for enabling syslog for level 7 in Cisco 7200 router:
conf t
logging 192.168.0.106
no logging console
logging facility local7
logging trap 7
logging userinfo
login on-failure log
login on-success log
exit
The above code snippet is quite self explanatory:
1) We mention the syslog server IP.
2) We disable displaying logging messages on console as it looks cluttered.
3) We enable logging for facility 7 (all syslog messages).
4) We enable trap for level7 (all traps).
5) We track user login information (important for tracking user login actions).
Additional commands to keep track of configuration changes by your employees:
conf t
archive
log config
hidekeys
logging enable
notify syslog
exit
exit
exit
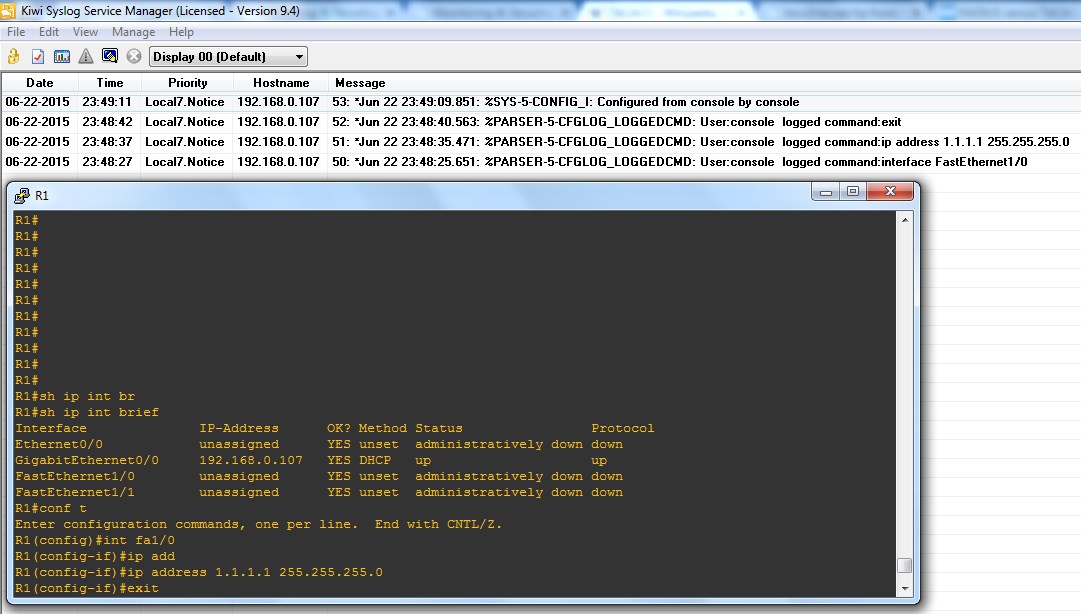
Well done! Let’s look at the output.
Steps for enabling TACACS + Authentication in Cisco 7200 router:
1) Install Tacacs + Server as usual accepting license agreements and all,
2) When asked for password, give a password. [ex: cisco] This will be used for connecting clients to Tacacs + Server.
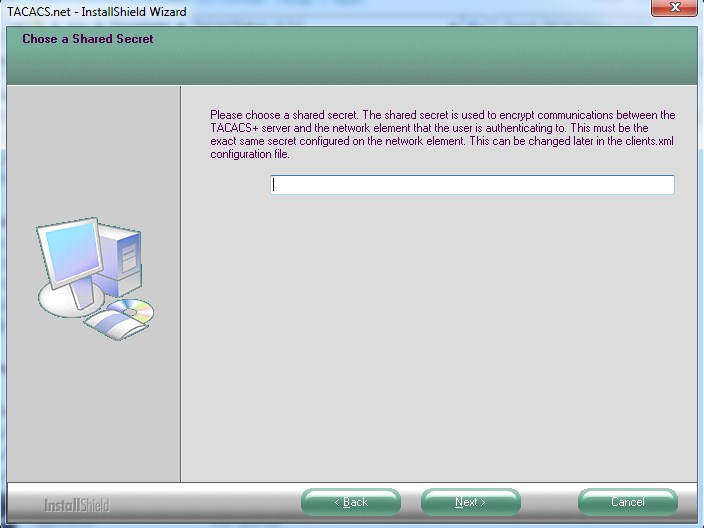
3) Click finish.
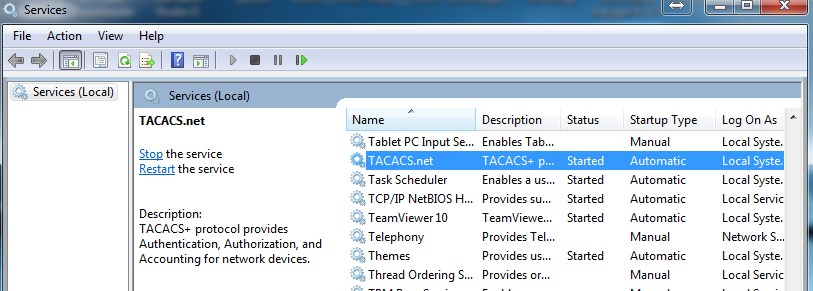
4) From run -> services.msc. Scroll down to Tacacs + service. It must be in started mode. If not, manually start it.
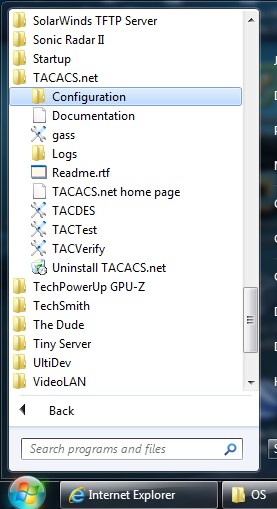
5) Then from start menu -> Tacacs.net -> Configuration. All the files related to Tacacs + configuration will be shown.
6) Right click on Tacplus.xml and select properties. Uncheck the “Read-Only” option. Click Apply -> Ok.
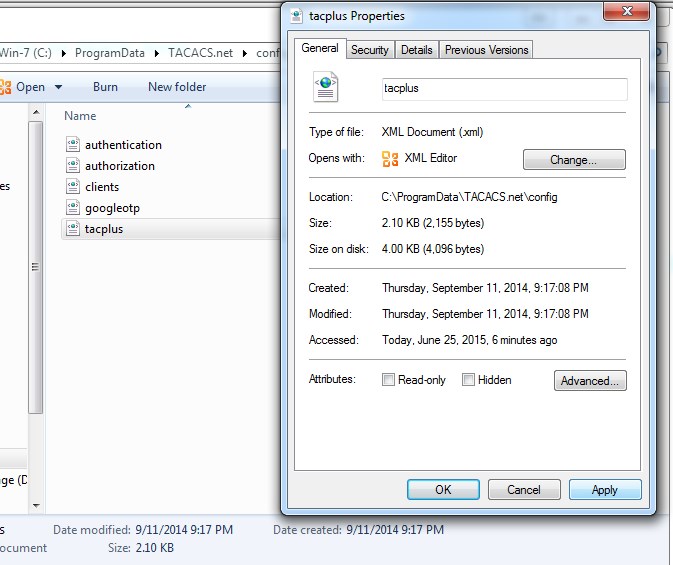
7) If you want to enable syslog server logging for Tacacs + then open tacplus.xml. Remove the comment mark <!–and –> from the line saying Syslog Host=”… and in host put IP of the Syslog Server.
Also, change <LocalIP> to your NIC’s IP as the Tacacs + Server will run on this interface. If you keep 127.0.0.1 then the router will not be able to authenticate with Tacacs + Server.
![]()
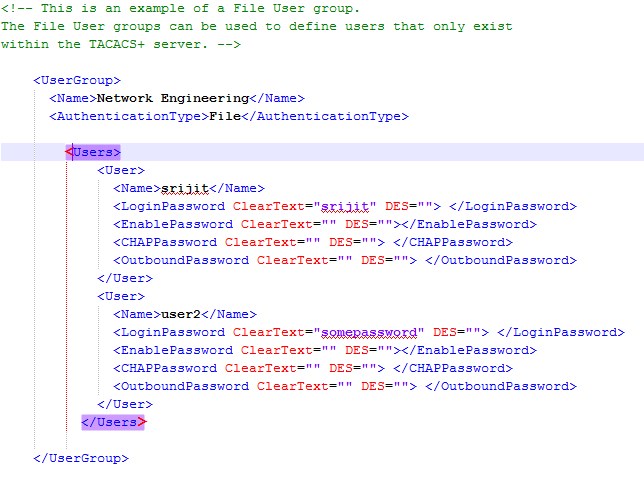
8) Now add a user in the authentication.xml file. Open authentication.xml and remove comments from User group and give desired username and password. Remember these users created exists only in the Tacacs Plus server.
 9) In the mean while you can see syslog messages appear in your syslog server console which indicates correct syslog configuration.

10) Now on our routers we issue the following commands.
config t
interface fa0/0
ip address 192.168.0.236 255.255.255.0
no shut
exit
line vty 0 4
transport input ssh
exit
enable secret cisco
username john password 0 john
username kim password 0 kim
ip domain name srijit.com
aaa new-model
aaa authentication login default group tacacs+ local
aaa authentication enable default group tacacs+ enable
aaa authorization exec default group tacacs+ local
tacacs server demo_tac
address ipv4 192.168.0.101
key 0 cisco
exit
exit
11) Let me give you a brief explanation of what I did in the previous step.
- Configured IP address for a interface fa0/0
- We disabled telnet and enabled only SSH for vty 0 4 for security reasons.
- We gave an enable password which will be used in case our Tacacs + Server is not accessible.
- We created two local backup users for emergency access.
- Assigned a domain name to our router. [Optional]
- Configured router aaa to allow only new aaa commands and disable old ones.
- For login authentication we gave first preference to Tacacs + Sever and second preference to local users.
- For enable authentication we gave first preference to Tacacs + Sever and second preference to enable password entered previously.
- For authorization in executable mode we gave first preference to Tacacs + Server and second preference to local users.
- We configured Tacacs + server and assigned IP address of our Tacacs + Server and gave key to authenticate with it.
12) Now let’s verify our configurations. [If you are trying this in your GNS3 lab disable windows firewall or you will not be able to authenticate.]
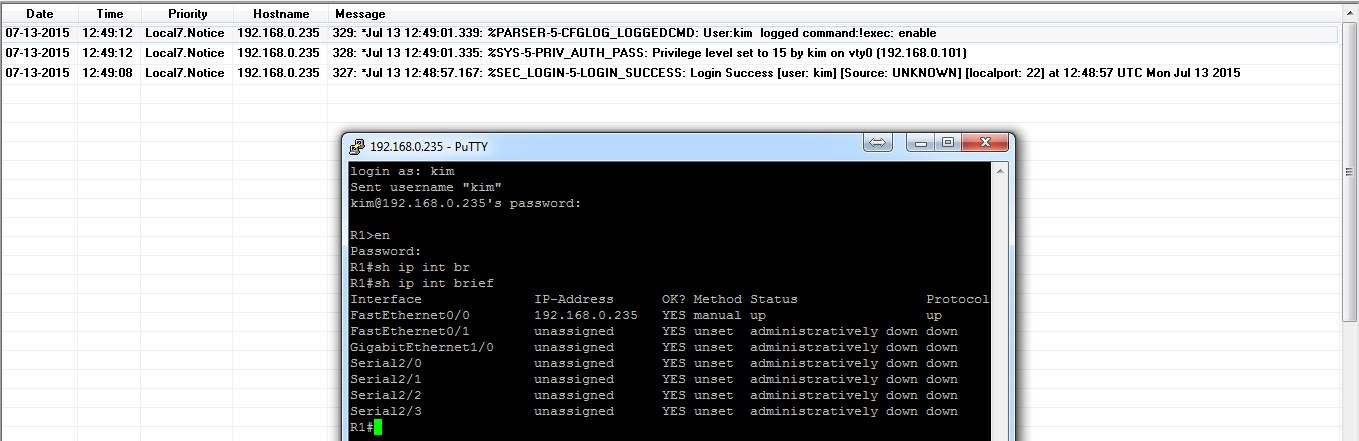
Scenario 1 – Authentication with Tacacs+ Sever enabled with Tacacs + Users.

Scenario 2 – Authentication with Tacacs+ Sever enabled with router’s local Users.
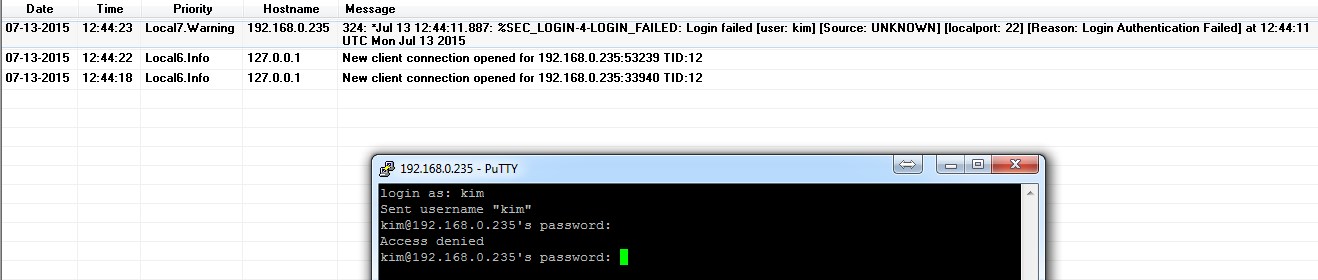
Scenario 3 – Authentication with Tacacs+ Sever disabled with Tacacs + Users.

Scenario 4 – Authentication with Tacacs+ Sever disabled with router’s local Users.
That’s it. We have now successfully configured TACACS + Server authentication along with Syslog Logging.
If you are interested to know more about authentication commands and their uses Cisco has a great article on it here.